
Ten Secrets for Creating Effective Google Slides Templates
Learn how to create truly functional Google Slides templates by learning secret tricks of the Qvik template knights. Last updated in September 2021 to reflect recently published features. Google’s G Suite has quickly become one of the world’s most used productivity solutions. G Suite is a bundle of different solutions, most notably Docs, Spreadsheets, and […]

Learn how to create truly functional Google Slides templates by learning secret tricks of the Qvik template knights.
Last updated in September 2021 to reflect recently published features.
Google’s G Suite has quickly become one of the world’s most used productivity solutions. G Suite is a bundle of different solutions, most notably Docs, Spreadsheets, and Slides. This challenger for Microsoft Office started its journey in 2007 under the name Google Apps and quickly grew with the help of several acquisitions. G Suite has seen massive growth in the past years. In early 2018, it boasted over 3 million paying customers. Considering that it has been adopted by organizations of increasing size, it can easily reach hundreds of millions of users. This also means that a growing number of people are abandoning (or forced to leave) MS Office in favor of G Suite.
If you are an advanced user transitioning from Powerpoint or Keynote, you can quickly spot the differences and some missing features in Google Slides, which can make it hard to reproduce company presentation templates. The fact that it has adopted a fully cloud-based approach from the start makes it different from good old-fashioned desktop applications. The strength of the synchronized cloud-based app is that multiple people can work on the same presentation in real time, which allows truly scaled productivity.
We at Qvik also have materials created in Keynote and in Slides in circulation. While we have yet to say goodbye to the former, we’ve stepped up our attempts to make Slides a competitive option for Keynote. In the process, we have had to discover a few neat workarounds that help to achieve good results. And by ‘good results’, we mean good-looking and usable slide templates.
N.B. This is not a guide for making effective presentations, only templates!
Initial shockers
Slides does have an adequate set of features for a presentation software. For instance, it includes templating, which is essential for anyone trying to manage company communications in a uniform visual style.
However, when you first start working in Slides, you will soon realize that many things are different from PowerPoint. For instance, only since July 2021 Slides has supported image placeholders. Luckily they are here today!
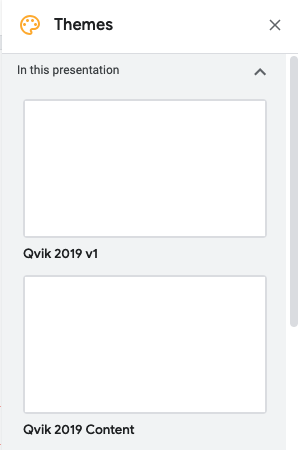
Slides doesn’t make it easy to use multiple master layouts in a single presentation. Instead, you need workarounds. These are supported, BUT switching the master for each slide is rather inconvenient. Master styles are called Themes in Google Slides language and the tool for editing them is Theme builder. This means you need to switch them from the right-hand Themes panel, unlike in Powerpoint, where you can select layouts from under the same Layout menu.
Right side panel hosts and hides multiple masters you may have inside a Slides master
One thing you need to know is that not all placeholders are created equal. The default, or the very first placeholder inserted through the Insert → Placeholder menu will have a special role of binding similar elements across layouts.
Unfortunately, there is no way to change placeholder assignment or make it visible so that after have you have inserted multiple placeholders of the same type, they all seem equal although they are not. Also if you should delete the first placeholder, in my experience, you lose the binding altogether, so take care with them. The only way to figure out that something is not right is to switch layouts to see if the elements don’t automatically align to the placeholders, but duplicate them instead.
To avoid this from happening: never copy placeholders to other layouts. Instead, duplicate the layout with the placeholders or build it from scratch.
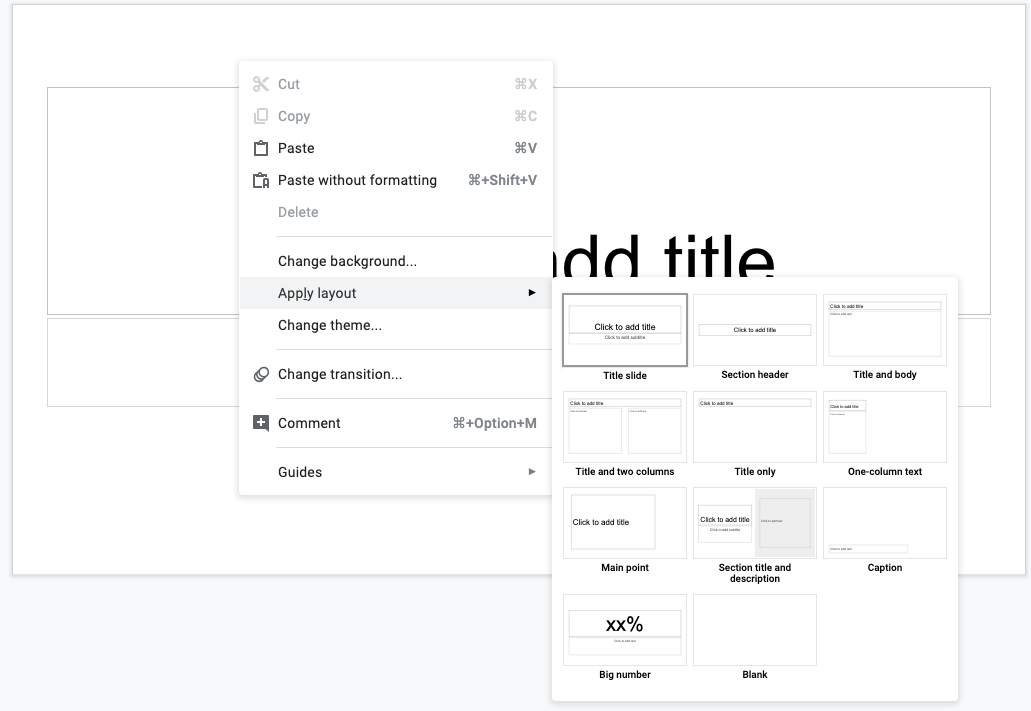
The 11 default layouts are conveniently accessed from several locations.
Another oddity you will notice is that the “default layouts”, 11 of them, enjoy special attention in your available layouts selection. Slides will always list them first, unlike all other layouts you create, which will appear in alphabetical order. This means that, if you wish to design your templates to be easy to use (that’s pretty hard to argue against…), you should get rid of all existing layouts and then name the new layouts so that they appear in the order you like.
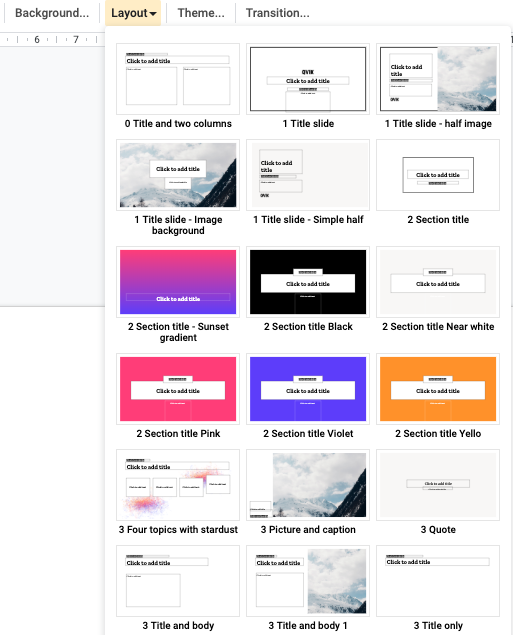
Renaming and numbering Google Slides layouts ensures they are displayed in the desired order
Personally, I start the names of all title slides ‘1 – ’, section titles with ‘2 -’, and actual content slides with ‘3 -’. That should make it pretty clear for most users.
And that’s not even all of it. Here’s my Top 5 Downsides of Slides as of April 2019, (note that Slides features are gradually evolving and, hopefully, this list will soon be out of date).
- Placeholders can slip out of control
- No useful support for vector graphics – use high resolution PNGs (but see the work around in the end)
- Limited image processing, e.g. can’t set transparency
- Master Layouts can’t be reorganized. Their display order in the Layout dropdown is determined by their alphabetic order: 1) inside the default placeholders; and 2) in your custom placeholders.
- Importing images can randomly result in poor resolutions.
Ten almost magical tricks and one work around
- Since 2021, you can and you should definitely use Image placeholders in theme layouts. They enable quick drag-n-drop operations for working with image slides. They have some limitations, for instance, you can’t place an image object in the layout on top of the image placeholder and you can’t just drag inside Slides.
- Use semi-transparent screenshots in the background (Send to back, or Ctrl-DOWN ARROW multiple times) to help with duplicating Keynote or PowerPoint masters manually. Screenshots can be directly copy-pasted to Slides, one of its best features which usually produces great results.
- Use two, or more, windows side by side when you work on a template Master, using the other one to preview the effects to avoid having to switch constantly.
- Test switching layouts so your placeholders don’t go out of order and lose their binding.
- There’s no keyboard shortcut for the regular view, but there is one for Grid view. Try that combination twice to get you to the regular slide view.
- Custom Bullet point styles are available through the Format → Bullets & formating menu and context menu when you’ve selected the bullet, not in the toolbar dropdown menu.
- The easiest way to get things to perfect alignment is to use Guides in combination of Shift+ARROW, nudging the elements until the placement is pixel-perfect. Zoom in to 200% to really see what you’re doing.
- Images can be shaped (cropped) to all default shapes such as circles, stars, clouds etc.. Just select the correct drop-down (Mask image) from the toolbar, confusingly a part of the Crop image tool.
- Image size and location can be easily controlled through the Format options… button in the toolbar to toggle the Size & position sidebar. You’ll see the Format options in the toolbar and context menu when you have selected an image.
- Out of the standard placeholders, slide numbers can cause surprises as many designers don’t like to include them in their templates. However, in a big organization, you’ll probably find a person who wants to add them, which will cause trouble. The most effective way to permanently disable, or effectively hide, placeholders is to place them outside the canvas area so they will not be displayed even if you try to insert them. I find this better than making them invisible on canvas.
Workaround to import vector images into Slides
Google Slides has an awful support for vectors as of August 2022. It will not import any common file format as such. Not even their own Google Drawings files are supported!
The only work around known to me is that can import Windows meta file (WMF) format file. into Google Drawings by using a very poorly documented trick of converting WMF file into a Drawings file and then using clipboard, Copy & Paste to transfer the vector image from Drawings into Slides.
Follow these steps:
- Upload a WMF file to Google Drive
- On Drive, select the file and then select Open with… Google Drawings from the secondary click context menu
- Now open the Google Drawings file and you can Copy the shape and Paste into Google Slides