
Figma’s interactive components – Love at first sight
Autolayout, multiple flows, and now interactive components. Seems like Figma knows how to keep its users happy. It has been just over a week since Figma’s interactive components officially went live and, to quote Chandler Bing from Friends: Could I BE any more excited! Some of us have been playing around with interactive components in […]

Autolayout, multiple flows, and now interactive components. Seems like Figma knows how to keep its users happy.
It has been just over a week since Figma’s interactive components officially went live and, to quote Chandler Bing from Friends: Could I BE any more excited! Some of us have been playing around with interactive components in the beta and chomping at the bit for them to go live.
To understand interactive components, you need to be familiar with some Figma basics, such as components and variants. Components are like reusable building blocks, and variants are the different versions and/or states of the component. You can read more about these in the Figma help center.
What are interactive components and why should you use them?
Usually, when you create a prototype with multiple interactions, you also need to create separate frames for each interaction. Like this:
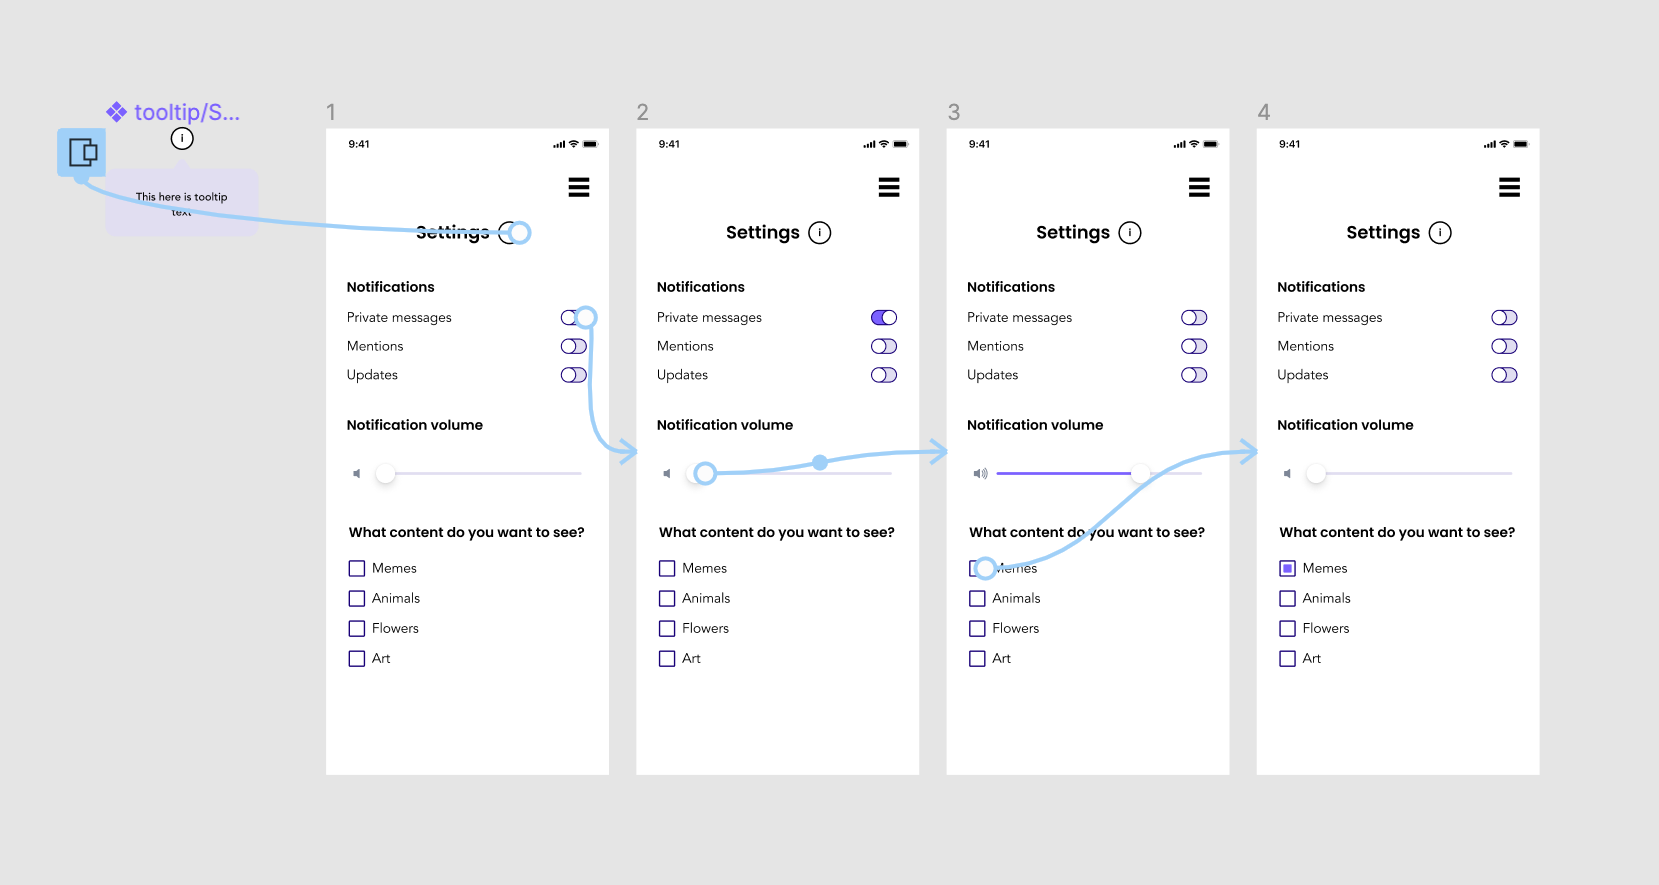
This is where interactive components come into play by letting you do several interactions in one frame.
How, you ask? Instead of creating the prototype interactions within the frames, you create the interactions within the component variants.
If you have a component library, you simply make prototype connections within that library. No need to create them from scratch. The big payoff is that it makes prototyping faster and easier. As an added bonus, you can even create simple loading animations with interactive components.
Perfection or not?
The only downside of interactive components that I can come up with is their use with autolayout. Most of the time it works well, until you try to put a dropdown menu over other components.
The Z index determines the order of overlapping elements. As we know, the only way to change the Z index is to switch the order of the elements on the layer panel. But if you switch the order while using autolayout, it also changes the order of said elements.
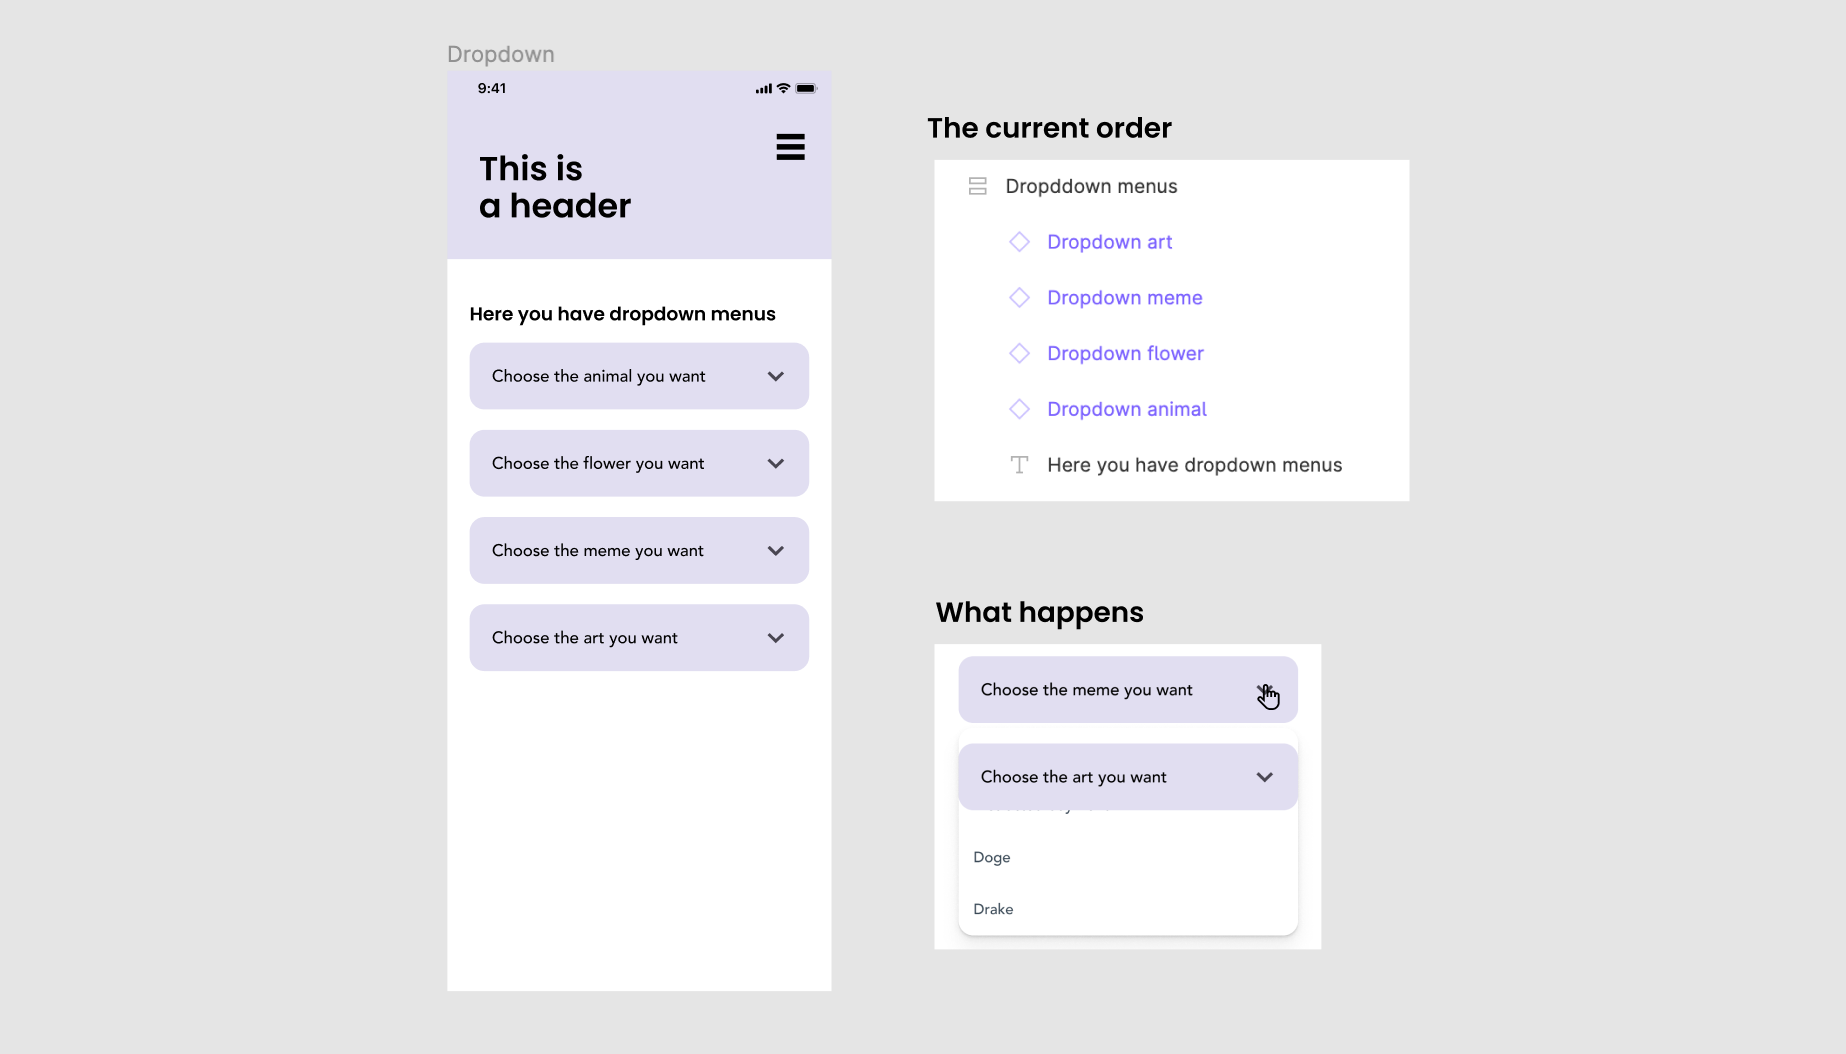
Below you can see how I worked my way around this issue by basically inverting the order. I have not found any downsides to this so far, except that it requires a bit of extra work. After you do this, the dropdown menu will open on top of the element underneath.
Summing it up
Interactive components make prototyping much easier and faster. Personally I’m in love with them and everything you can do with them. The only thing that I miss is the Z index function, but that’s another story.
I recommend trying out interactive components yourself or looking at one of the many tutorials online. For me, the best way to learn was by experimenting with the new features at my own pace, so I built a tic tac toe game.
It’s okay to have fun while you master interactive components. Enjoy!
PS. Here’s also a little tip by our very own senior product designer Jukka Forstén on how he has linked the different variants.
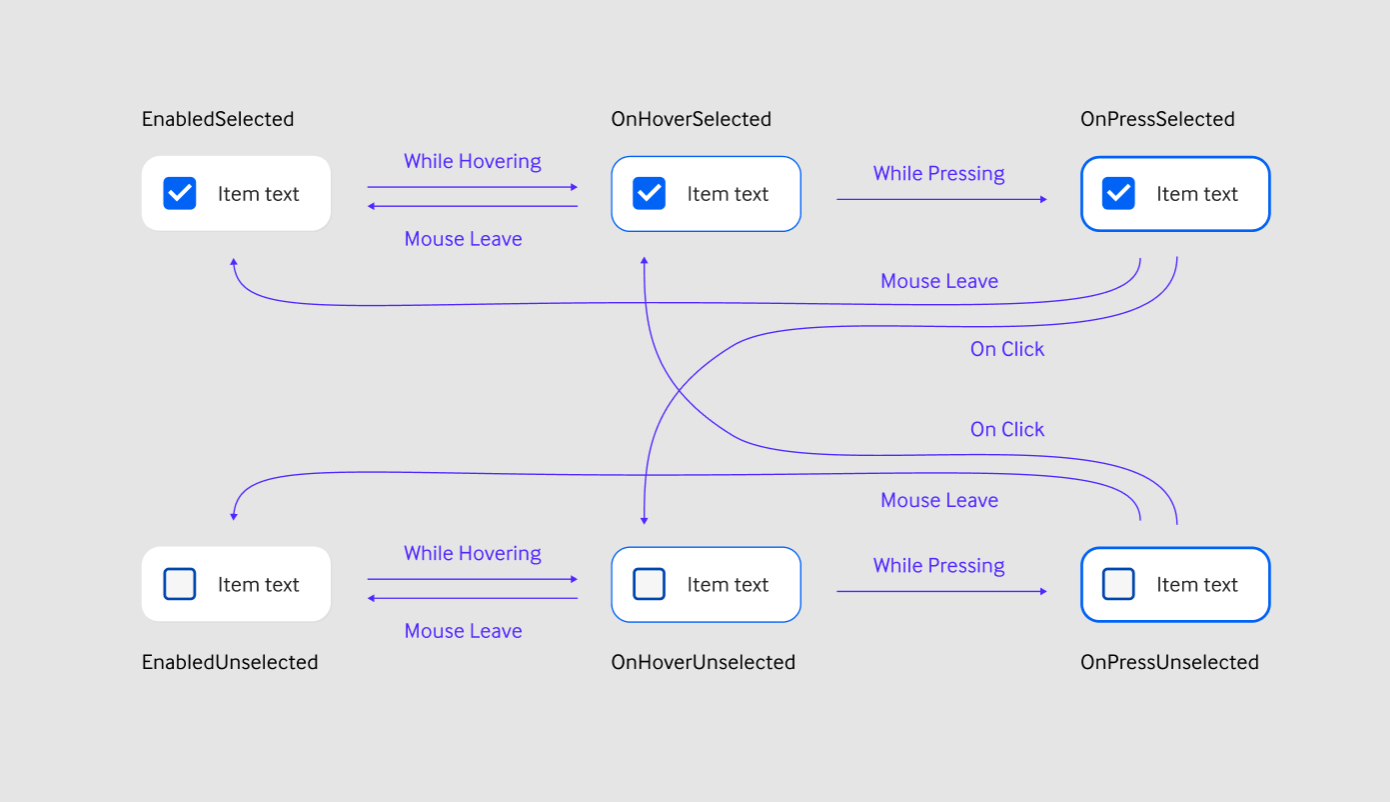
Illustration: Minna Nurminen