Building widgets on iOS 14: Limitations and possibilities
Widgets are a useful way to access an app’s information at a glance. This feature allows us to provide more useful content and helps us build engaging products.

Widgets are a useful way to access an app’s information at a glance. This feature allows us to provide more useful content and helps us build engaging products.
Widgets have many convenient use cases. You can see your to-do list items, your activities from Apple Watch, or the last three songs you’ve been listening to on Spotify. The list goes on, but there are naturally some limitations too, which I’m going to cover later in this blog post.
Apple introduced widgets at this year’s WWDC, and the concept is similar to Android Widgets in many ways.
The biggest differences between Android and iOS widgets are:
- Interactivity. You are not allowed to interact with an iOS Widget except through the simple Button or Link interaction. In Android, you can interact with the actual widget right on the home screen.
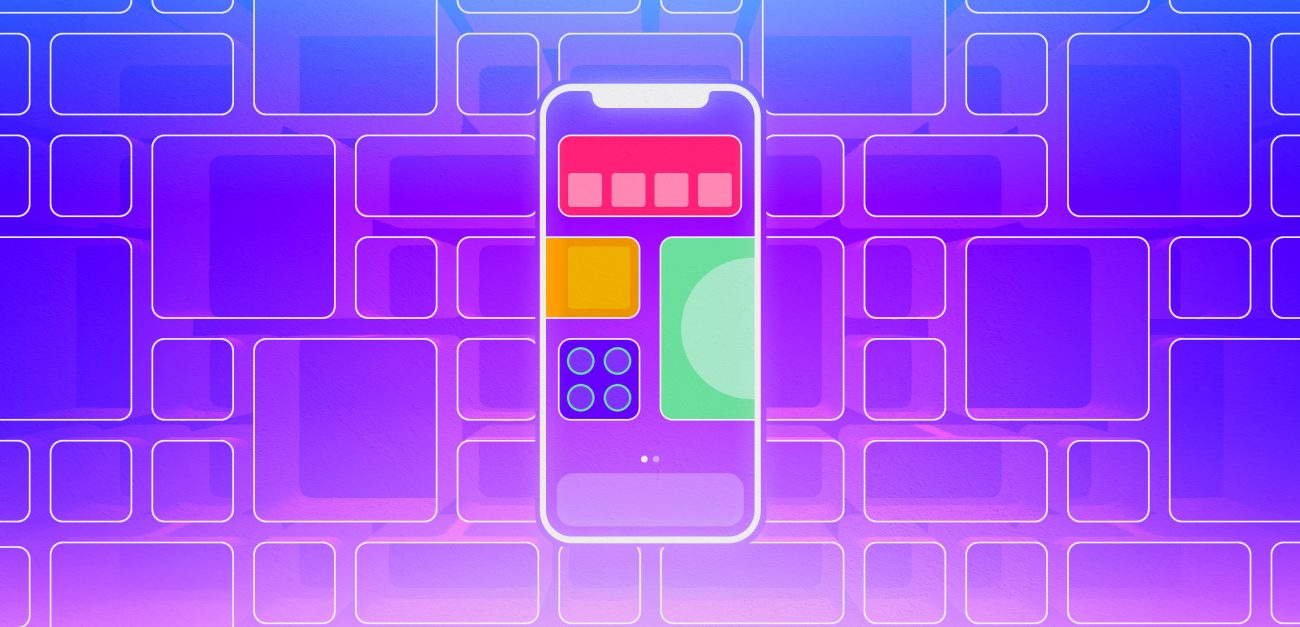
- Screen Estate. iOS Widgets come in three sizes: small, medium or large. On the Android side, you are free to choose the size of your widget.
- Design. In iOS, you are allowed to use either light mode or dark mode for your background, but Android lets you use a transparent background as well.
Even though Apple is releasing this feature late, it doesn’t mean that it won’t change in the future. I believe we will see more changes and improvements in upcoming iOS releases.
Why building widgets is important
We have lots of apps on our devices. Widgets are a new way to stand out, get noticed, introduce new technologies to our apps and maintain the interest of our users.
Here’s an example of how and why this feature can motivate users or engage them with your app. The key here is reachability.
I enjoy reading and have a couple of favorite blogs that I follow and read regularly. So to get the most out of my reading experience, I use the Reeder app. Thanks to Reeder’s widget support, I can effortlessly keep myself up to date with the latest blog posts: I can see the titles without losing them among the other notifications.
Implementing widgets: Limitations and other things to consider
In this blog post, I will try to share my key takeaways for when you decide to build a widget to your app. To put it in a nutshell, creating a widget is the same as creating a new target from Xcode IDE. If you need more detail, I recommend Apple Developer Documentation – it’s a great tool for learning new Apple features.
I faced some limitations during our internal project, named QTracker.
The things you can do about screen real estate and functionality inside the widget are limited compared to normal applications. You’re not allowed to use ScrollViews, and you have to decide how many UI elements will be visible in the widget based on your preferences or those of the user (we will talk about this in a later section).
The use of videos or GIFs is limited. If you think about the Apple ecosystem, this rule is quite understandable since they could violate user privacy.
Also, interactions are limited. Even though you are not allowed to use the scroll views or any gesture such as swipes, long taps, etc., you can use Button, Link in code to navigate to a specific screen when the user taps any visible item on the widget.
Things to consider when building a widget for your app
Choose your files wisely. Sharing code between the widget and its parent app can lead to unnecessary additions to your widget. So make sure you’re going to use that shared class between two targets (widget extension and parent app).
Try to conform to the SOLID principles for modular architecture. In my experience, one class was dependent on another class, and that class in turn depended on some other class. As a result, the code keeps giving compile time errors because those classes are not shared to the widget extension (problem mentioned under option 1).
Make a clear distinction between the widget extension and its parent app’s source code by using macros such as #if canImport(WidgetKit). This way, if your app won’t crash if it supports versions older than iOS 14.
Store data into disk instead of making requests inside of the widget code, then share the saved data through App Groups. This option is quite important if you want to show some data that belongs to the parent app.
For more information about how to share data between an extension and an app, I would recommend this article by Derik Ramirez. Basically, writing one helper class in a project that uses Apple’s FileManager API would help keep things maintainable and easy to use. You can then use that wrapper class inside of your real network request class to store some data for the widget.
The same rules apply to using the canImport macro which I mentioned as the third option, since you are going to use this wrapper class inside of your parent app.
Technical aspects
Widget design comes in three types: system small, system medium and system large. You can support all three of them or stick with just one size by defining this option in your code. In order to do that, you need to define which size you will support by using the supportedFamilies method inside of your WidgetConfiguration class. Here is a sample piece of code:
@main
struct MyAppWidget: Widget {
let kind: String = "My App Widget"
var body: some WidgetConfiguration {
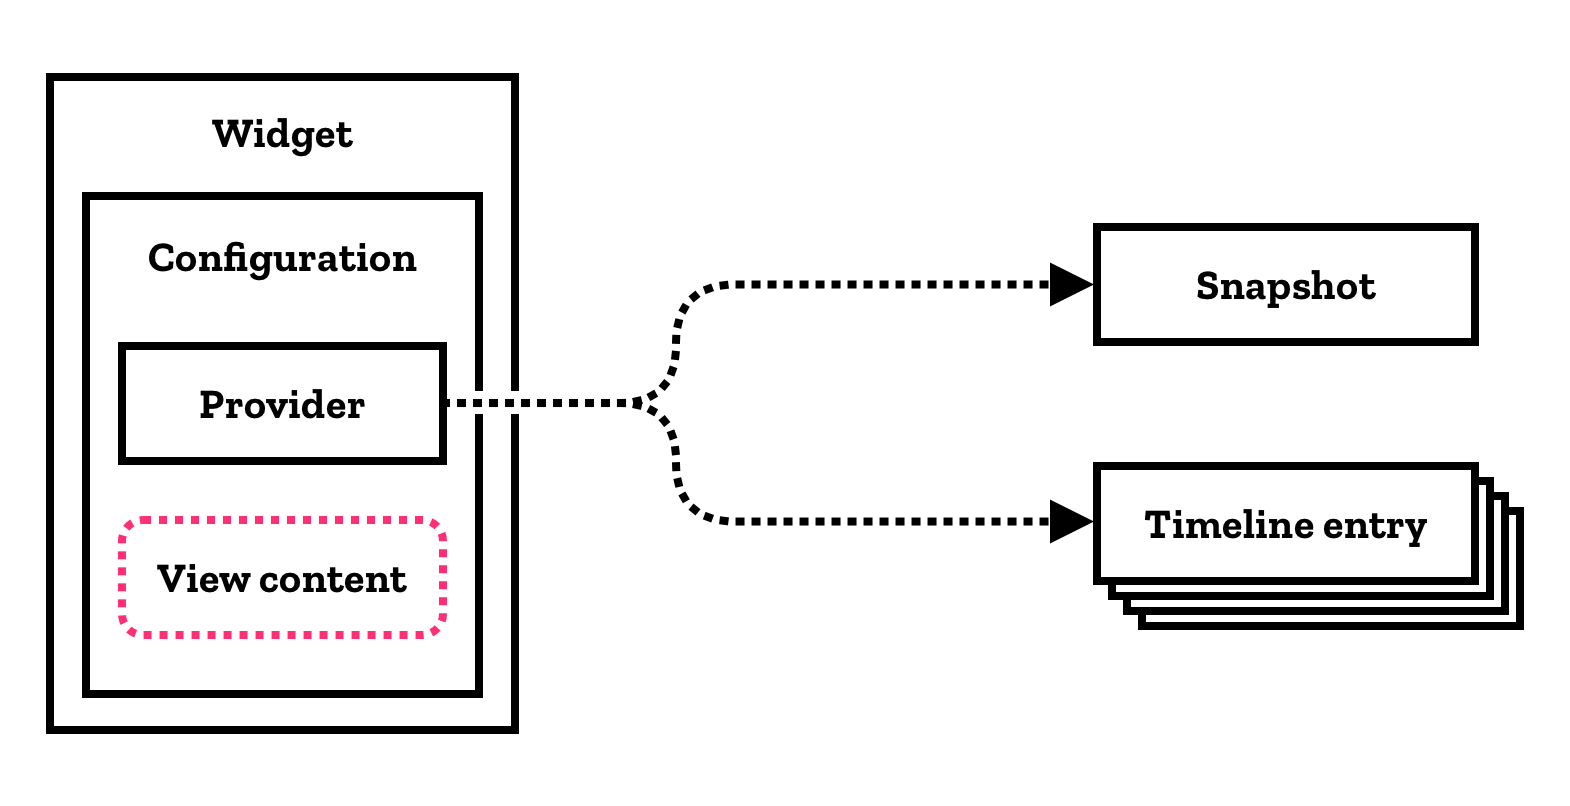
StaticConfiguration(kind: kind, provider: Provider()) { entry in
WidgetEntryView(entry: entry)
}
.configurationDisplayName("My App Widget")
.description("Example of my widget")
.supportedFamilies([.systemLarge])
}
}
As you can see, we specify in .supportedFamilies([.systemLarge]) that we only support the large screen widget.
Source: Apple Developer Documentation.
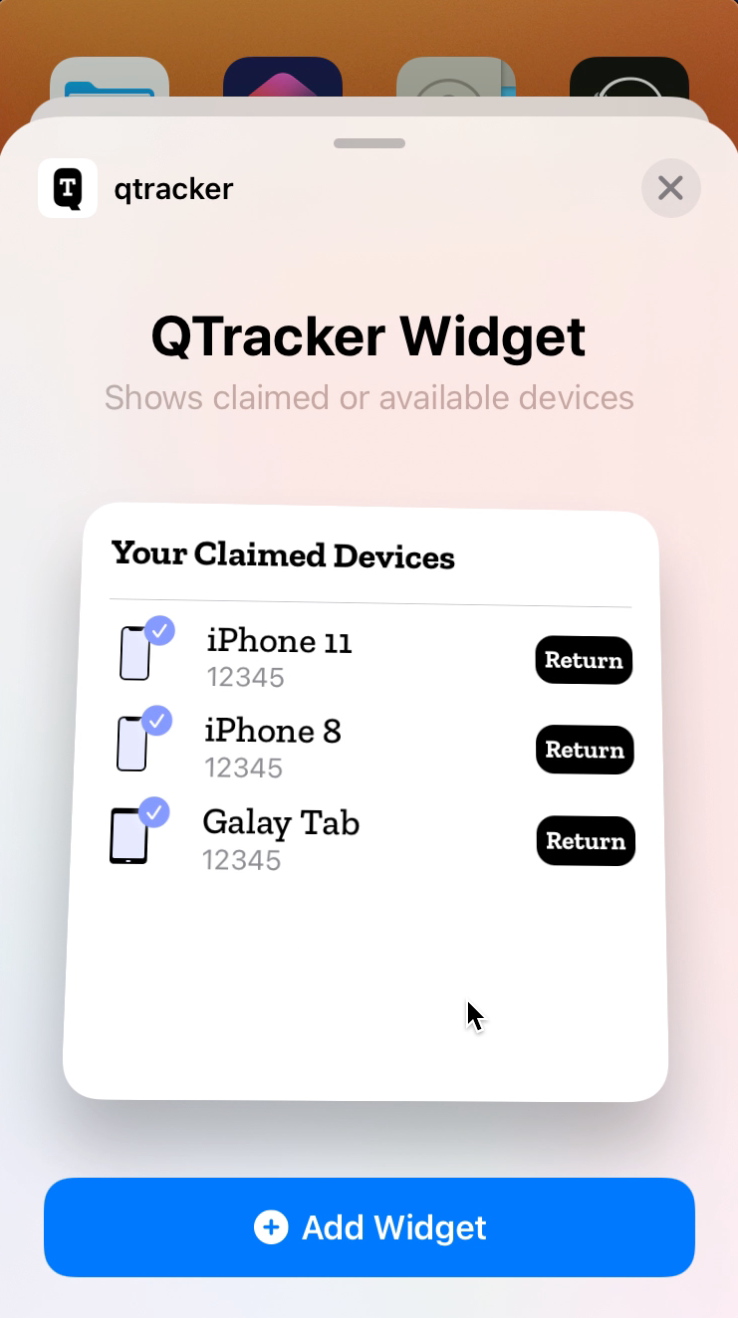
Here’s a screenshot from our internal app to clarify how the snapshots are added.
Add a snapshot
This part is probably the first thing users will see if they want to add your widget to their dashboard. You have to provide snapshots in the widget’s implementation so that when the user wants to add a snapshot, they will see some made-up data in the real UI.
The things in that list are not real data. They’re provided in the code with the TimelineProvider protocol method snapshot(with:completion:)
Provide a date for updating the widget’s data
Widgets are intended for having quick access to information, so showing the data immediately after the user has added the widget to their home screen would be the best practice for a good user experience. But what to do if you have to update a particular piece of data shared to a widget? In this section, I’m going to cover a couple of ways to achieve this.
Timeline Provider
As I mentioned in the previous section, we can use TimelineProvider to provide some data over time with the getTimeline(in:completion:) method. In this method, you can define a refresh policy by making a new timeline for the widget request so that it can show refreshed data. Or you could call your helper wrapper class to provide new data.
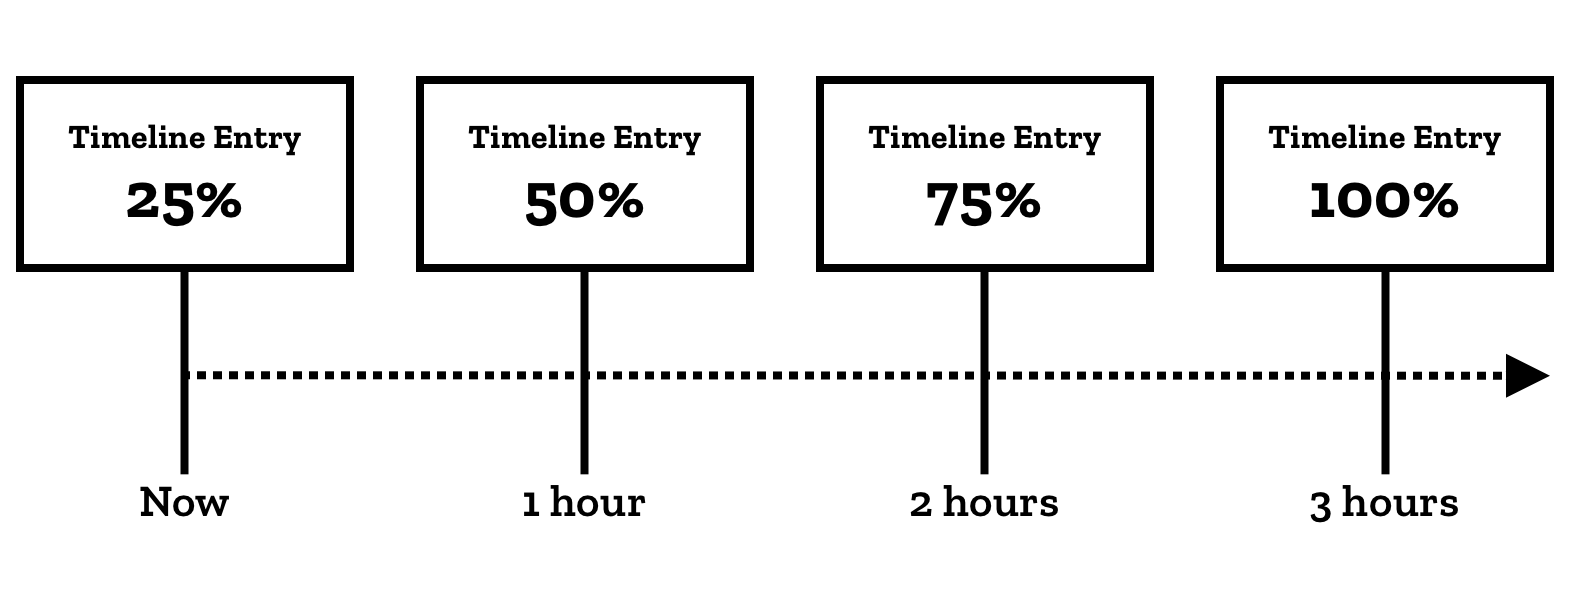
Timeline provider. Source: Apple Developer Documentation.
Using WidgetCenter
Simply put, you can use the WidgetCenter notification system to request a new timeline if you want to refresh the widget timeline, instead of waiting for the timeline to refresh itself based on the date you provided as mentioned in the previous section. A word of warning once again, don’t forget to add an availability macro to the code to prevent possible crashes in older versions of iOS 14, like this:
if #available(iOS 14.0, *) {
WidgetCenter.shared.reloadTimelines(ofKind: "widget_name")
}
Final thoughts
Widgets are a new, powerful way to give users information without needing to open the app. This is a new but promising technology, and I have no doubt that we will see more improvements and enhancements from Apple in the future.
I encourage you to try it out for yourself. If you want to see what’s available right now, you can take a look at this blog post from Readdle about widgets.